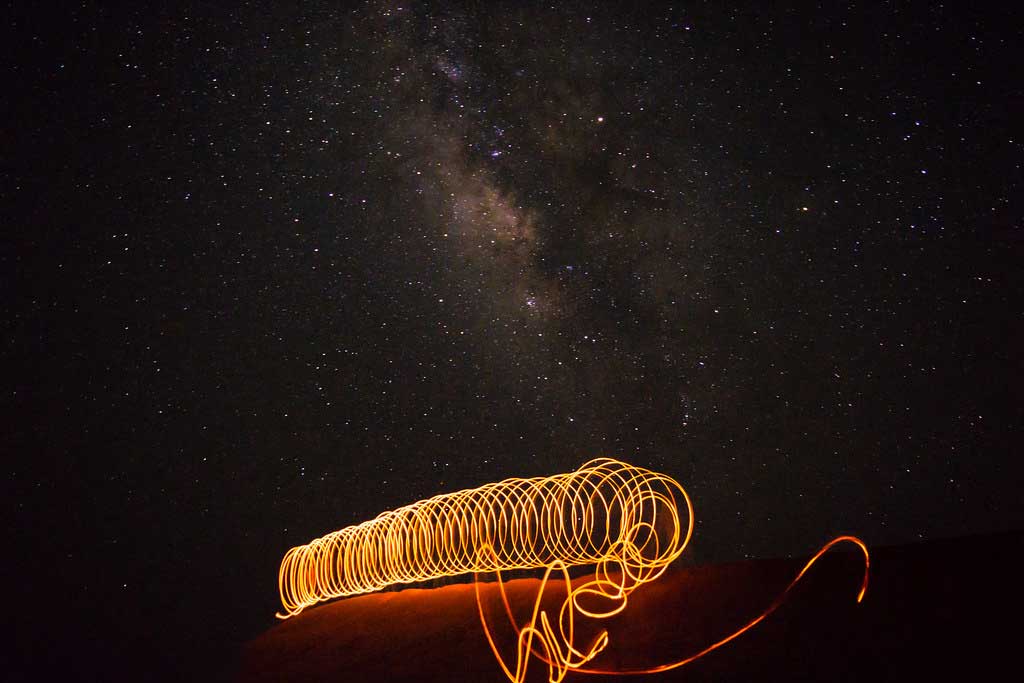
My first experience of shooting in low light was unforgettable. I was standing under a sky full of stars at the UAE and Saudi Arabia border (called no man’s land). The view was breathtaking — the Milky Way stretched above me, and the desert below sparkled with scattered lights. But when I clicked my camera, the photo turned out too dark, grainy, and far from what I had seen with my eyes. Thank God! I was with a photography group, and one of the senior photographers shared some basic Low light Photography Tips, which helped me to take some stunning shots of the Milky Way.
If you’ve ever struggled with blurry shots, grainy images, or dull colors at night, you’re not alone. Shooting in dark conditions challenges both beginners and professionals. But with the right low-light photography knowledge and understanding of the camera’s manual mode, you can turn difficult conditions into creative opportunities and capture images that truly stand out.
In this blog, I’ll share practical low-light photography tips that every beginner should know, from adjusting camera settings to using creative techniques.
1. Use a Tripod to Avoid Camera Shake
In low light, your camera often needs a slower shutter speed to let in more light. The problem is, slow shutters make handheld shots blurry. That’s where a tripod comes in. A sturdy tripod keeps your camera stable, ensuring your photos remain sharp even with long exposures.
📌 Pro Tip: If you don’t have a tripod, place your camera on a stable surface like a wall or rock. You can also use the camera’s self-timer or a remote shutter release to reduce shake caused by pressing the shutter button.
2. Open Up Your Aperture
The aperture controls how much light enters the lens. In low light, using a wide aperture (f/1.8, f/2.8, etc.) allows more light to hit the sensor, which brightens your photo and reduces the need for high ISO.
Wide apertures also create a beautiful shallow depth of field, perfect for portraits in dim settings like cafés or night streets.
📌 Pro Tip: Prime lenses with wide apertures (like a 50mm f/1.8) are budget-friendly and excellent for low-light photography.
3. Increase ISO — But Be Mindful of Noise
ISO determines your camera’s sensitivity to light. A higher ISO (800, 1600, or more) brightens your photo, but it also introduces noise (grain). Modern cameras handle noise much better, so don’t be afraid to push ISO when necessary.
The trick is finding balance — enough ISO to brighten your photo without making it look too grainy.
📌 Pro Tip: Shoot in RAW so you can later reduce noise during post-processing without losing detail.
4. Slow Down the Shutter Speed
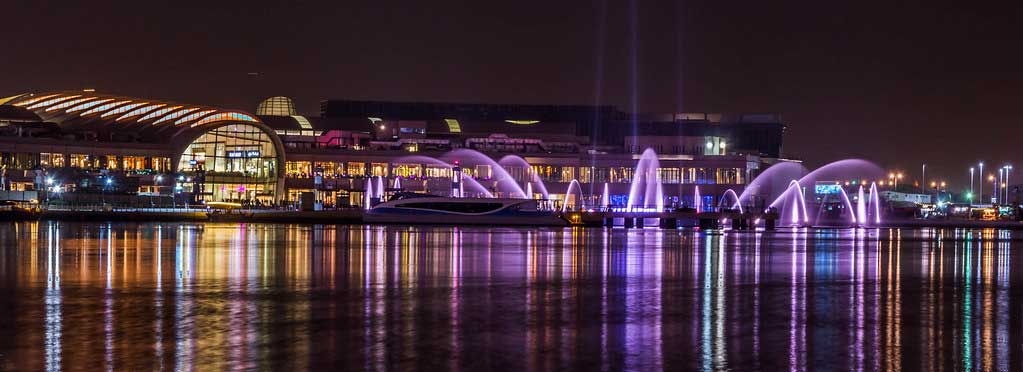
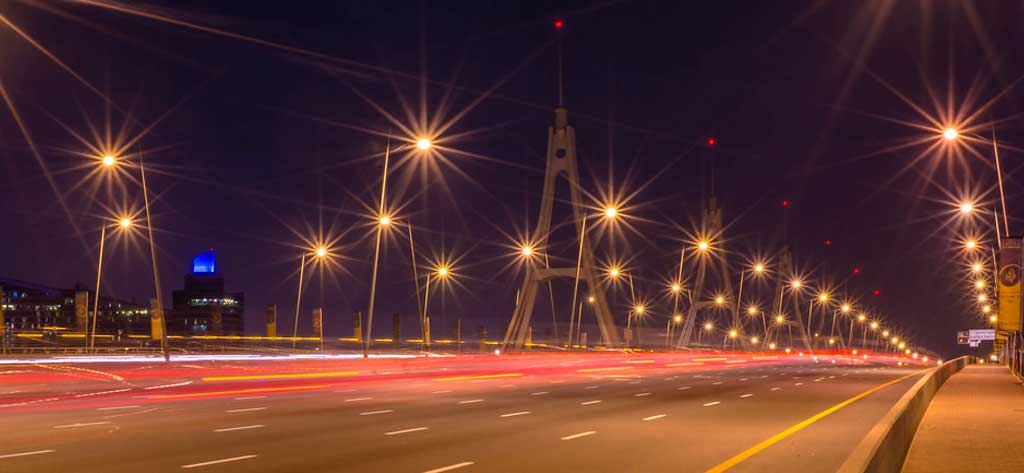
One of the most important low light photography tips is experimenting with shutter speed. By slowing it down (1/30s, 1/10s, or even several seconds), your camera gathers more light. This works well for static subjects like night landscapes, cityscapes, or light trails.
📌 Pro Tip: If you’re photographing moving subjects in low light, you’ll need to balance shutter speed with ISO and aperture to avoid motion blur.
5. Use Manual Focus
In the dark, your camera’s autofocus often struggles. Switching to manual focus gives you control and prevents wasted shots. Many cameras and lenses have a “focus peaking” feature that highlights the focused areas — use it to your advantage.
📌 Pro Tip: If you’re shooting stars or nightscapes, set your focus to infinity and adjust slightly until the stars appear sharp. If you don’t have infinity on your lens, focus on any available light at a distance or use a torch to set the focus, then switch the lens to manual focus.
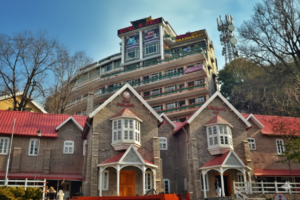
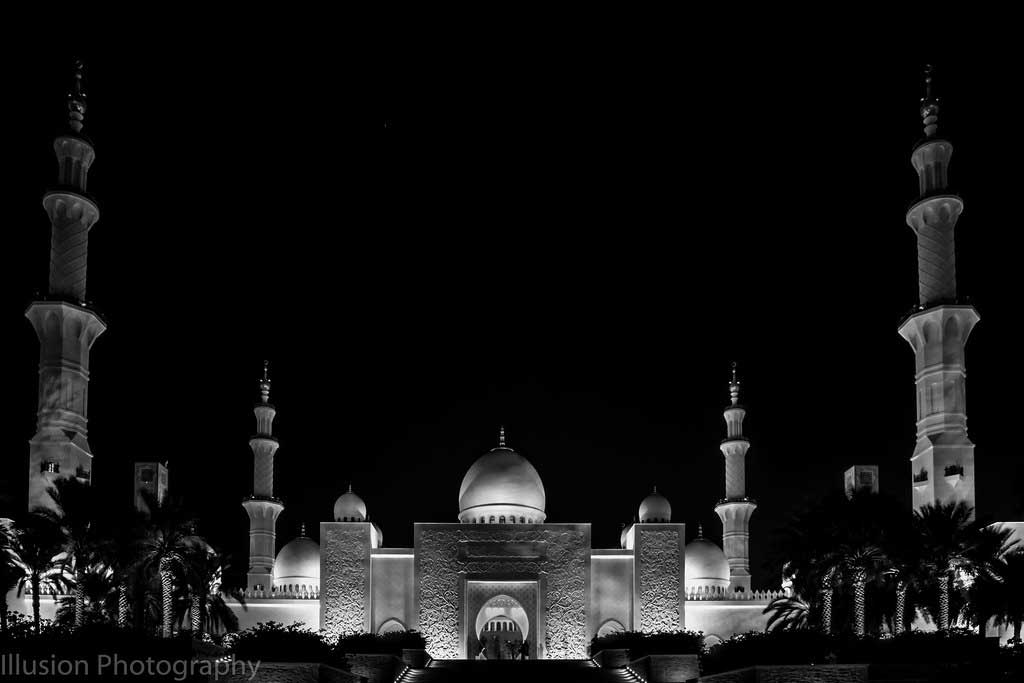
6. Take Advantage of Available Light Sources
Street lamps, candles, neon signs, and car headlights — all these can be your allies. Position your subject near a light source to illuminate them naturally.
For portraits, placing your subject close to a soft, diffused light source (such as a shop window or lamp) creates a mood and drama. This is one of the most creative low light photography tips because it teaches you to use your environment.
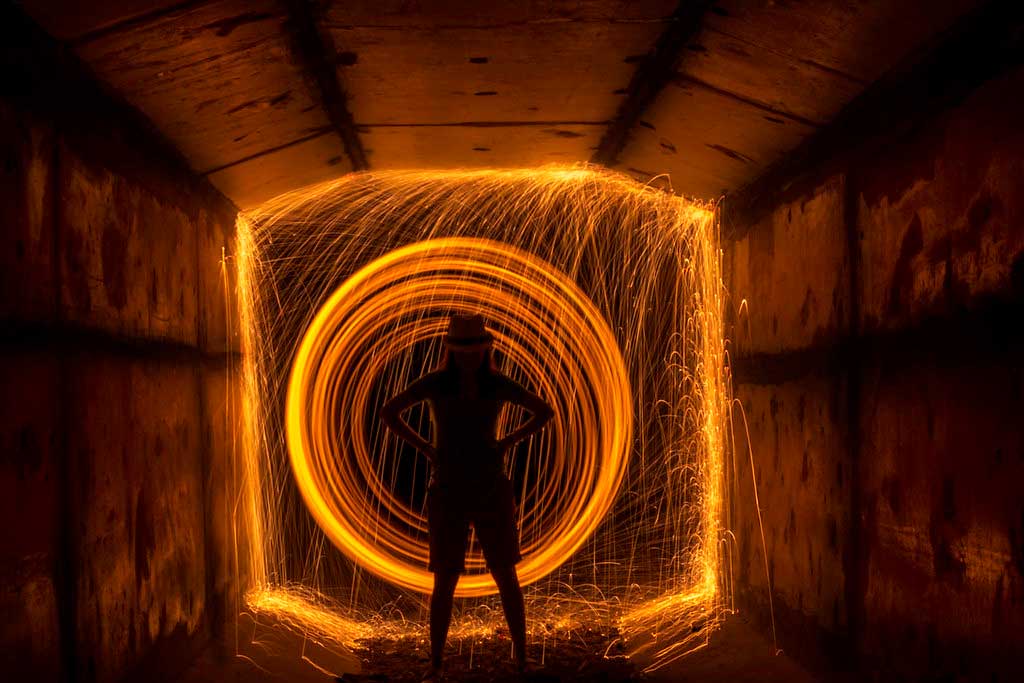
📌 Pro Tip: Try “light painting” with a flashlight or phone to add creative highlights in your frame.
7. Keep Your Camera Steady with Image Stabilization
If your lens or camera body has image stabilization (IS/VR/IBIS), turn it on. It allows you to shoot at slower shutter speeds without as much risk of blur. While it won’t replace a tripod, it’s a lifesaver when you’re shooting handheld at night.
8. Shoot in RAW for Flexibility
When working in difficult lighting, shooting in RAW format gives you maximum flexibility. RAW files retain details in shadows and highlights that JPEGs can’t. Later in editing, you can brighten dark areas, adjust colors, and reduce noise much more effectively.
📌 Pro Tip: Combine RAW shooting with software like Adobe Lightroom for the best results.
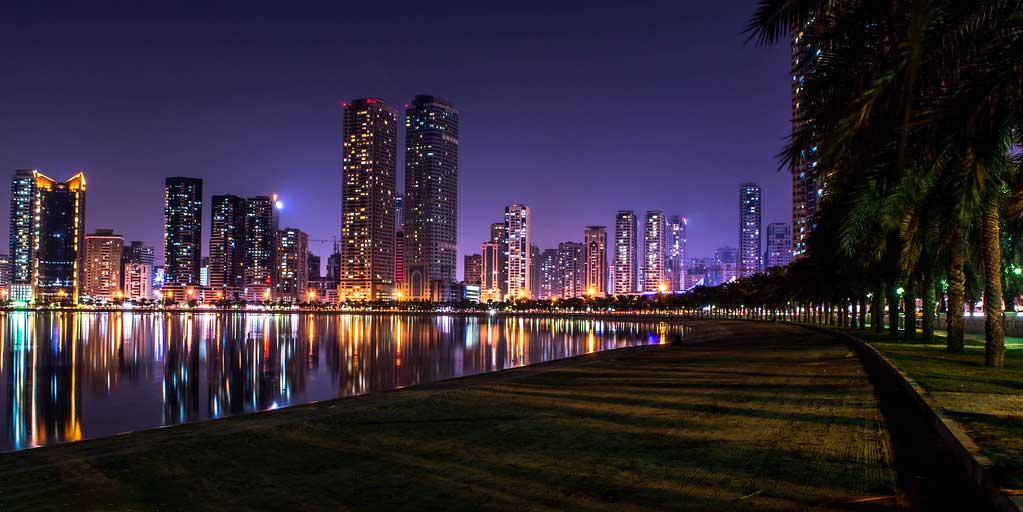
9. Experiment with Long Exposures
Low light is the perfect time to experiment with long exposures. Set your shutter speed to several seconds and capture moving lights — cars become light trails, rivers turn silky smooth, and stars form trails across the sky.
This is where low light photography becomes magical. You’re not just recording a scene — you’re capturing time itself.
📌 Pro Tip: Use your camera’s “bulb mode” for exposures longer than 30 seconds, and don’t forget to use a remote shutter or timer.
10. Use a Fast Lens
A fast lens (with a wide maximum aperture like f/1.4, f/1.8, or f/2.8) makes a world of difference in low light. These lenses let in more light, meaning you can keep ISO lower and shutter speeds faster. Even an affordable 50mm f/1.8 lens can completely transform your night shots.
11. Master White Balance in Low Light
Artificial lights often create strange color casts — yellow from streetlights, green from fluorescents, or blue from LEDs. Adjusting your white balance ensures your photos look natural.
📌 Pro Tip: If you’re unsure, shoot in auto white balance and correct it later in RAW editing.
12. Practice Patience and Creativity
Perhaps the most overlooked of all low light photography tips is patience. You might need to wait for the right light, adjust your settings repeatedly, or revisit a location. But low-light scenes are also full of creative opportunities — silhouettes, reflections, light trails, and starry skies.
📌 Pro Tip: Don’t be afraid to experiment. Sometimes the “mistakes” — like a little blur or unexpected shadows — create the most artistic results.
Conclusion
Low-light photography can feel intimidating at first, but once you learn how to control your settings and use available light creatively, it becomes one of the most rewarding forms of photography. By applying these low light photography tips, you’ll be able to shoot everything from cozy indoor portraits to dazzling nightscapes with confidence.
Remember, practice is key. Each time you head out at night with your camera, you’ll learn something new about how light interacts with your scene. Soon, the challenges of shooting in the dark will turn into opportunities for creativity.
So grab your camera, step into the night, and let these low light photography tips guide you toward capturing the beauty that shines even after the sun goes down.