he first time you switch your camera dial to Manual Mode (M), it can feel intimidating. Suddenly, the safety net of auto settings is gone, and you’re in full control. But here’s the truth: mastering manual mode is the most empowering step in your photography journey. It transforms you from someone who takes pictures into someone who creates images with intention.
To truly grow as a photographer, it’s essential to master the exposure triangle — ISO, aperture, and shutter speed — while also learning how to read and use light effectively. Equally important is developing a strong eye for composition and refining your skills in post-processing will help you translate your creative vision into impactful images.
In this Photography Tips blog, I’ll guide you through the essentials of shooting in manual mode, breaking it down into simple steps so you can confidently take charge of your camera.
Why Learn Manual Mode?
Before diving into the technicalities, let’s answer the big question: Why shoot in manual mode when auto works just fine?
- Creative Control – You decide how bright or dark your image should be.
- Consistency – Auto mode often changes settings from shot to shot. The manual gives you uniform results.
- Flexibility – From light trails at night to freezing a footballer mid-kick, manual mode allows you to capture exactly what you imagine.
Professional Growth – Every professional photographer understands manual mode. It’s the foundation of creative photography.
The Exposure Triangle – Your Best Friend
When you switch to manual mode, the very first thing you’ll need to understand is the Exposure Triangle. This triangle is made up of three fundamental camera settings: Shutter Speed, Aperture, and ISO. Together, they control how much light enters your camera and how your final image looks in terms of brightness, sharpness, and mood.
Think of it this way: photography is all about light, and these three settings are the tools that let you shape that light. If one side of the triangle changes, you usually need to adjust the other two to keep your photo properly exposed.
1. Shutter Speed – Controlling Motion
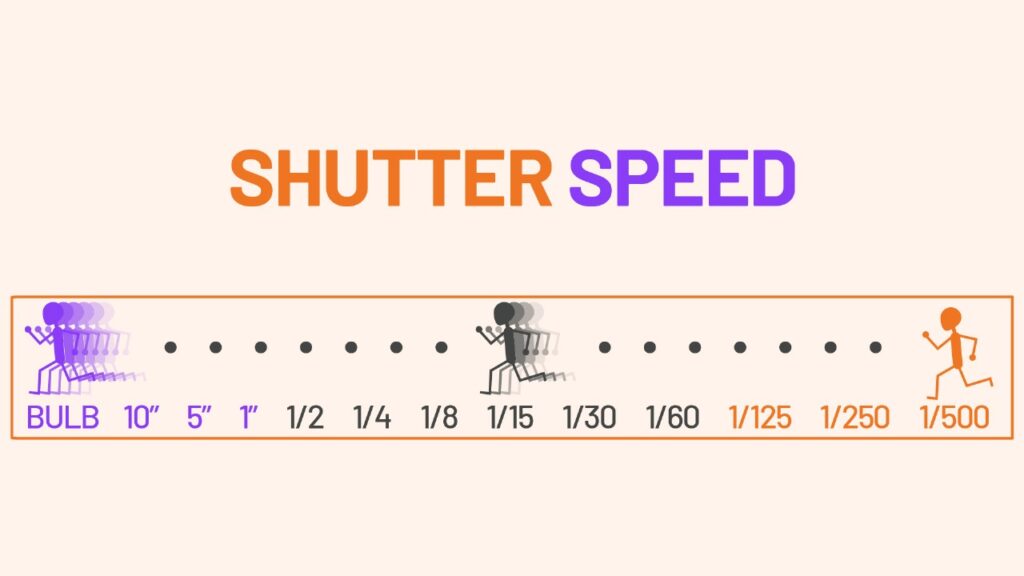
Shutter speed is the length of time your camera’s shutter stays open to let light hit the sensor.
- Fast Shutter Speeds (1/1000s, 1/2000s, etc.)
These speeds capture split-second moments. Perfect for freezing action — like a football player mid-kick, a bird in flight, or a child running. Every detail is crisp and sharp. - Slow Shutter Speeds (1/30s, 1 second, or more)
These allow more light in but also introduce motion blur. Used creatively, this blur can look magical:- Flowing water turns silky in waterfall shots.
- Car headlights turn into glowing trails at night.
- Stars streak across the sky in long-exposure astrophotography.
⚡ Tip: For handheld shooting, avoid going below 1/60s unless you have very steady hands or a tripod. Otherwise, camera shake will cause blur.
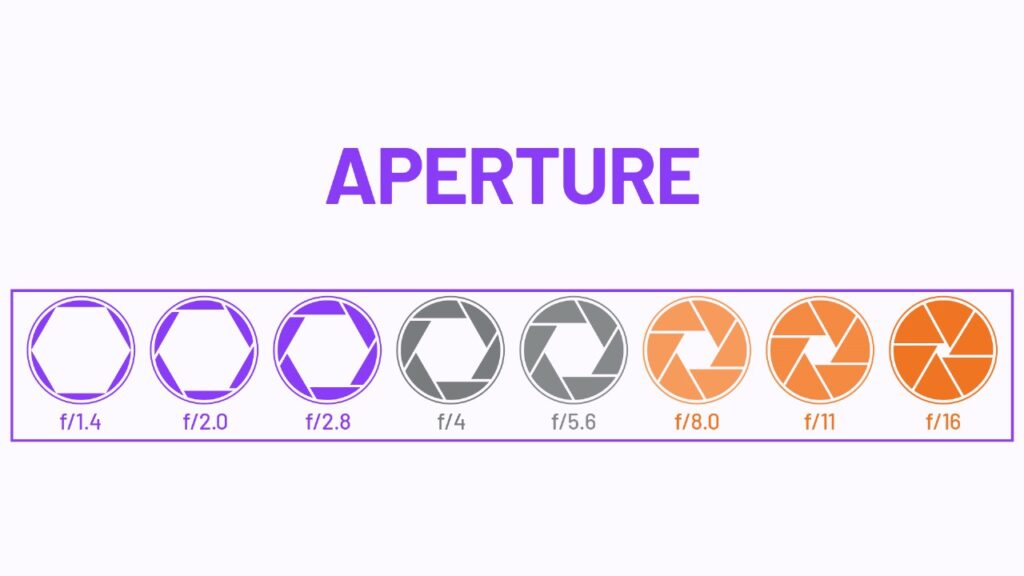
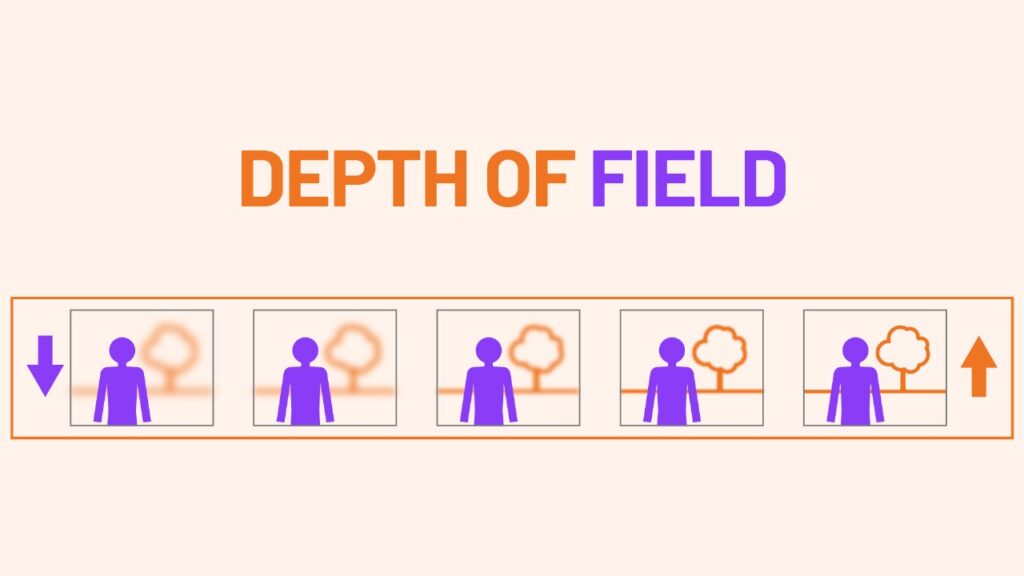
2. Aperture (f-stop) – Controlling Depth of Field
Aperture refers to how wide or narrow your lens opens to let light through. It’s measured in f-stops (like f/1.8, f/4, f/11).
- Wide Aperture (f/1.4, f/2.8)
- Lets in lots of light.
- Creates shallow depth of field — meaning only your subject is sharp while the background becomes soft and blurry (bokeh effect).
- Ideal for portraits, food photography, or close-up details where you want the subject to pop.
- Narrow Aperture (f/11, f/16, f/22)
- Lets in less light.
- Creates deep depth of field — most of the scene, from foreground to background, is sharp.
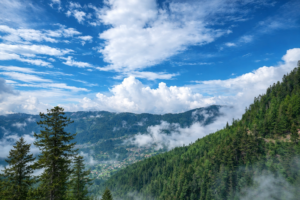
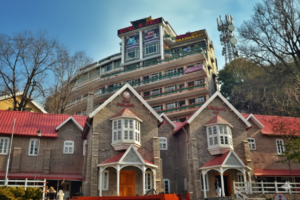
- Perfect for landscapes or architecture where you want everything in focus.
📌 Remember: The smaller the f-number, the larger the opening, and vice versa. This can feel confusing at first, but once you get used to it, it becomes second nature.
3. ISO – Controlling Light Sensitivity
ISO adjusts how sensitive your camera’s sensor is to light. directly affecting how bright or dark your photos appear. It’s a powerful setting you can adjust not only for technical accuracy but also to achieve creative effects.”
- Low ISO (100–200)
- Best for bright conditions (like outdoors on a sunny day).
- Produces clean, sharp images with no “grain” or “noise.”
- Medium ISO (400–800)
- Good for indoors, cloudy days, or shaded areas.
- Adds slight noise but still keeps good quality.
- High ISO (1600 and above)
- Useful in very low light situations (like concerts, indoor events, or night shots).
- But beware — high ISO introduces noise (tiny specks or grainy texture) that reduces image quality.
Balancing the Triangle
The key to mastering manual mode is balance. If you change one setting, you’ll often need to adjust at least one of the others to keep exposure correct.
For example:
- If you slow down your shutter speed to let in more light, you might need to narrow your aperture or lower your ISO to avoid overexposure.
- If you open your aperture wide (f/1.8) for a dreamy portrait, you may need a faster shutter speed to prevent too much light from flooding in.
- If you’re shooting at night and raise your ISO to 1600, you might balance it with a faster shutter speed to reduce motion blur.
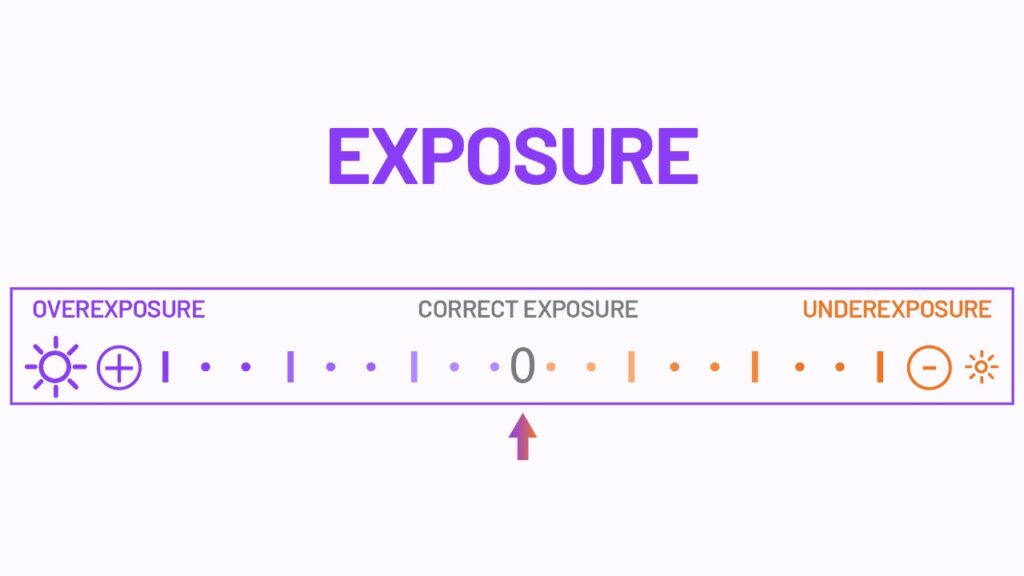
Pro Tip: Your camera’s light meter will guide you. Inside the viewfinder, look for a scale (–2 … 0 … +2). If the indicator is near 0, your image is well-exposed. If it’s leaning too far left, the photo will be underexposed (too dark). Too far right, and it’s overexposed (too bright).
This balance between shutter speed, aperture, and ISO is the foundation of photography. Once you master it, you’ll be able to handle any lighting situation and capture images exactly the way you envision.
Step-by-Step: How to Shoot in Manual Mode
Step 1: Start with Aperture Priority
If you’re a beginner, first set your aperture and let the camera suggest shutter speed and ISO. This helps you understand how aperture affects your photos.
Step 2: Set Your ISO
- Daylight → ISO 100–200
- Indoors → ISO 400–800
- Night → ISO 1600+ (but watch out for noise)
Step 3: Adjust Shutter Speed
- For handheld shots, keep it above 1/60s to avoid blur.
- Use a tripod if going slower.
Step 4: Choose Your Aperture
- Portraits → f/1.8 to f/4 for background blur.
- Landscapes → f/8 to f/16 for sharpness across the frame.
Step 5: Balance with the Light Meter
Your camera has a light meter scale (–2 … 0 … +2). Aim for “0” to get a balanced exposure, then experiment with slightly underexposing (–0.3) or overexposing (+0.3) for creative effects.
Practical Examples
- Bright Sunny Day
ISO 100, f/11, 1/250s → Clear and sharp street or landscape shots. - Indoor Portrait
ISO 400, f/2.8, 1/100s → Soft background blur, subject in focus. - Night Photography
ISO 1600, f/2.8, 10s (tripod) → Stunning light trails or star photography.
Common Beginner Mistakes (and Fixes)
- Photos Too Dark? → Lower shutter speed, widen aperture, or raise ISO.
- Photos Too Bright? → Increase shutter speed, narrow aperture, or lower ISO.
- Blurry Shots? → Increase shutter speed or use a tripod.
- Too Much Grain? → Lower ISO and compensate with aperture or shutter speed.
Extra Tips for Shooting in Manual Mode
- Use the Histogram – Don’t just trust the LCD. The histogram shows whether highlights or shadows are clipping.
- Shoot in RAW – More flexibility in editing exposure and white balance.
- Practice in Different Lighting – Try bright midday sun, golden hour, and night.
- Take Notes – Remember what settings worked in which situation.
- Be Patient – Manual mode takes practice, but once you get it, it’s second nature.
Why Manual Mode Makes You a Better Photographer
Learning manual mode isn’t about making life harder. It’s about unlocking creativity and confidence. You’ll stop asking, “Why did my camera choose this setting?” and start thinking, “What do I want this photo to look like?”
Every photo becomes a deliberate choice, not just a lucky click. That’s the difference between a snapshot and a photograph.
Conclusion
Switching to manual mode can feel overwhelming at first, but it’s the key to mastering photography. Once you understand how shutter speed, aperture, and ISO work together, you’ll have the power to create images that reflect your vision.
The journey may start with trial and error, but with each shot, you’ll gain confidence and control. Remember: your camera is just a tool — you are the photographer who creates the story.
So, grab your camera, turn that dial to “M,” and start experimenting today. Manual mode is where true creativity begins.